It’s not easy to get the perfect eye makeup. But it is easy to make a mistake and ruin your look, especially when you’re in a rush or don’t know what you’re doing. And that’s where eyelash extensions come in! If you want full, thick lashes without having to apply mascara all day long or risk smudging them with your fingers, this article will show you how to remove them safely and easily. We’ll walk through everything from removing any remaining glue residue and cleaning up messy edges (no one wants an eyelash sticking out) to giving your eyes time for recovery before applying another set of extensions. This way, you can say goodbye forever to clumpy mascara messes and never have “raccoon eyes” again!
Understand how to remove your old lashes
When it comes time to remove your old lashes, it’s important to understand the process before you get started. This way, you can avoid any potential accidents and make the process as smooth as possible. Here are a few key things to remember:
- Use a good quality lash adhesive remover. This will help dissolve the glue that is holding your extensions in place, making them much easier to remove.
- Do NOT pull on your lashes! This can cause unnecessary damage and may even lead to hair loss.
- Gently massage the adhesive remover into the lash line, taking care not to get it in your eyes. Let it sit for a minute or two before slowly peeling off the extensions.
- If any adhesive residue remains, use a cotton swab with alcohol to clean the area and dissolve any leftover pieces.
How to Remove Eyelash Extensions Step By Step
1. Remove any glue residue
The first step in removing your eyelash extensions is to get rid of any leftover glue. This can be done by using a cotton swab and some warm water. Gently rub the cotton swab against the glued-on lashes until the residue comes off.
Alternatively, use a thin, eyelash extension-safe adhesive remover and cotton ball or Q-tip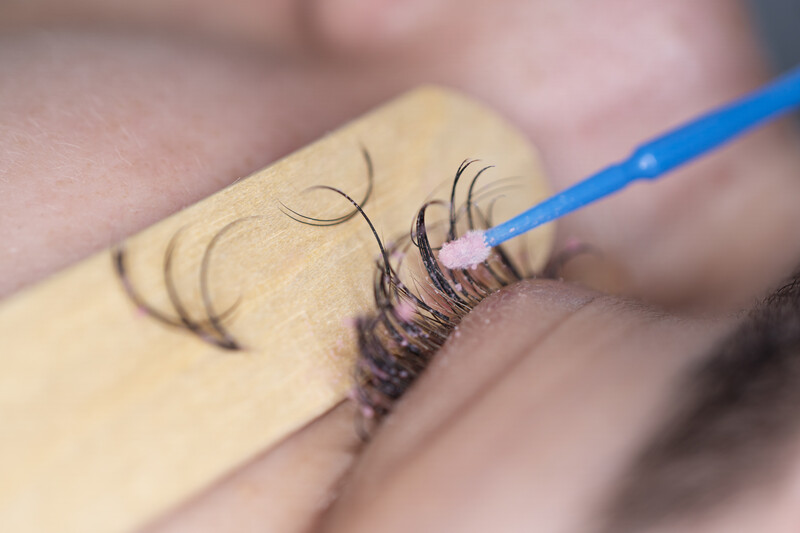 to gently wipe away any remaining glue on the lashes and around the eyes. It is important that you don’t use an oil-based product like baby oil, Vaseline, mineral oils as those will only make the process more difficult.
2. Remove your lashes
Now that all of the glue is gone and any messy edges have been trimmed away, it’s time to remove the rest of your eyelash extensions. Take off each extension slowly and carefully, working from the outside corner inwards – do not pull from the middle of the eye as it may dislodge natural lashes. If you have any extra glue left behind, just use a cotton swab to wipe it off.
3. Clean up any excess residue with makeup remover or olive oil
Any leftover glue will harden over time, making it difficult to clean off your eyelids. However, if you act fast, you can easily take care of the problem by using makeup remover. Do not rub in, but instead sweep pad over lashes in the same direction they lay to remove the glue. Apply olive oil on the face after removing all extensions to calm area and help lashes grow back.
4. Wait for your eyelids to return to normal before applying more lashes
Your eyes may be a little red and puffy after peeling off the extensions, but don’t worry – this is completely normal. Wait until they’ve returned to their original shape before applying another set of eyelash extensions. It takes about 3 months for lashes to fully grow back in.
When the time comes, reattach eyelash extensions following the same instructions as above, but in reverse. Apply lash glue to lashes and place lash band against eyelid, starting from the middle of the eye and working towards the outside corner. Press down lightly but firmly so the band adheres correctly to natural lashes. If you have a special occasion coming up, plan to apply for your new extensions a week in advance so your eyes can recover before it arrives!
Mistakes to Avoid When Removing Eyelash Extensions
When removing eyelash extensions, there are a few mistakes you should avoid. Here are three of the most common ones:
- Pulling on your lashes – This can cause unnecessary damage and may even lead to hair loss.
- Getting adhesive remover in your eyes – If this happens, rinse your eyes with water immediately and seek medical help if necessary.
- Not cleaning up any excess residue – Leaving adhesive residue on your eyelids can make it difficult to remove the extensions next time around.
You should also remember that getting eyelash extensions is a process, and the first time isn’t always perfect. Save your favorite lashes for special occasions like prom or weddings: you can reuse them as much as you like!
Removing your eyelash extensions is not as difficult as you may think! This article will guide you through the process, including important steps like removing the glue and cleaning up any residue. Soon enough, your natural lashes will be fully exposed and you’ll be ready for a new set of extensions!
Shirley Mist has been involved in fashion and design for many years. She has also written extensively for many online publications. She currently writes for The Tribune World and is a valued member of our team.